Friday, December 4, 2009

Supply Lines


This is PEX tubing. We are using this for our plumbing supply lines. PEX is great stuff.


This is a sleeve for the PEX. One thing that is bad for PEX is UV rays so it must be shielded. Also, the blue designates it as a cold water supply line.


All those lines are connected to a manifold and go to sinks, showers, and toilets.


Under floor electric


We installed conduit along the stem wall under the Ledger. Underneath every outlet in the house is one of those boxes.


Here is the wire that we pulled through all the conduit.


This is a point where everything comes together or crosses. Our main panel will be where the grey conduit is sticking up. The white PVC is the sleeve for the propane line. The black ABS is a drain line. The black coil on the wall is our phone line. This area is all filled in now. 

Septic Tank

If you remember way back to my first blog entry about the Perc Test. Well, this is what that test was for. We got our Septic Tank. 


Here it is in two parts on the truck. 


This is the bottom half of the tank in the hole. 


Here is the top after being joined to the bottom and some back fill. 


This is the leach line it is 68' long. We had rock left over from the rock we had delivered for under the house. This was a good thing as it was perfect for leach rock. 


Gas Line


We don't have natural gas in our area, but we can put in a propane tank. Here are the gas lines.


This is a tee in the line. The PVC is just a sleeve to help protect.


Yep, They came all the way from Thailand.


Sunday, October 4, 2009

Underground Plumbing


We got to start on plumbing last week.


An assortment of fittings. 45's, 90's , couplers, tee's, reducers, and more.


Drains and vents from above.


Here it is from below.

Floor


The lumber has arrived and we have been busy getting started on the floor.

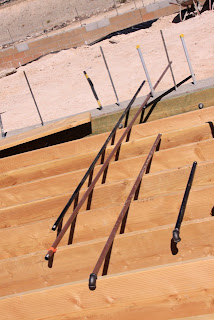
Glulam beams on the far left in the wrapping. The shortest was 16' the longest 32'. Next pile over are the joists. Truss joists on the bottom, up from that are the 2"x10" and 2"x12" joists. The green pile is treated lumber for the ledgers, 3"x12" and 2"x12"


Two days to put all the Glulam beams in. Kristi operated the excavator and lifted them all into place. Every beam needs to be cut and shaped to fit. Holes need to be drilled for bolts.


The build team. We have hangers nailed on the beams. The ledger is still missing from the back wall, you can see it on the left. Some of the truss joists are in.

Rocks

We are building a house with a passive underground climate control system. There are actually many different ways of doing this, all with their own unique features. Our system is pretty simple. We dug down three feet into the ground. Our stem wall extends two feet above the ground. This area was filled with 24 inches (290 tons!) of smooth river rock. We built vents in the stem wall on all sides of the house to allow fresh air into this space. The air is cooled under the house and pulled up through floor vents as the hot air is pulled out through exhaust vents in the ceiling. As I said, there are many variations to a system like this depending on your homesite, climate, materials available and so on. Operating our system will take a little trial and error, but should be pretty easy. It basically comes down to opening and closing vents to adjust the temperature in the house. Anyway, the rocks got here a few weeks ago thanks to the guys from Cemex. The rocks we got are a byproduct from the production of cement. A cement plant is basically a mining operation. As they screen material they are left with rocks about the size of a tennis ball to a small football. The cement company has no use for these rocks and they just pile up. These rocks are perfect because of the small air spaces they create together. I expect the majority of our cooling to come from our passive system, however we are building a home in a very hot climate and it is likely that we will need air conditioning for some additional cooling. We will see how the passive system works and go from there.


The rock arrived via dump truck. 300 tons total, 19 loads.


A gargantuan loader with a skilled operator.

Tuesday, September 1, 2009

Grout

It was another early morning of pouring concrete. We got to the site at 4:30 am and set up lights. We were pouring by 5 am.


When we poured the footings, the concrete was poured directly from the truck to the form. In this situation, the concrete is poured into a pump, which you can see on the left. The pump pushes the concrete through a tube and then into the block wall. Every cell needs to be vibrated to make sure there are no air pockets. The rebar leaning against the wall gets stabbed into the freshly poured grout every four feet.


Here we are installing the hangers for the beams which hold the floor joists.


Kristi stabbing in the rebar.


There it is, freshly grouted stemwall. We poured about 39 yards of concrete that morning. The grey conduit with the yellow tape on it is for our electrical outlets, these were put in the night before. There was a lot of cleanup to get the grout off the side of the walls and level. All of this had to be done before the concrete got too hard. Overall things went very well. Just a fun fact, at this point, I estimate our house to weigh close to 450,000 lbs!

Stem Wall pt.2

OK, the Stem Wall was such a big job it gets two entries...

Kristi is cutting rebar with a mini grinder. All the rebar needs to be just below the top of the stem wall. I am using a skillsaw to cut an opening for a doorway.


Here we are both cutting rebar in the footings.


These are completed and ready for the wood forms to be set on top.

Tuesday, August 11, 2009

Stem Wall

Soon after the concrete was poured, our blocks arrived.


The first blocks to be laid! You can see the forms are still on the concrete. Kristi and I stripped them over two days. The first day we got all the easy ones. The second day we worked on the tough ones with sledge hammers, stakes as levers, and jackhammers for the really tight ones.


The first course is coming together here. My job was to bring all the block off the pallets to the interior. We hired professional block layers to set the block.


This is the finished height of the stem wall. It looks taller now than it will after we backfill. Our floor will sit at this level. You can see vents in the wall here, this is for a passive cooling system. I'll get into the details of this in a future post.


This is taken from the inside. The white lines on the wall are to mark the location of the rebar, the dots are where we need to drill for installing hardware to hang the floor. The wood columns are forms that we will pour concrete in for interior footings, they still need more reenforcement.

Thursday, July 23, 2009

Concrete


It was an early morning. The first truck showed up at 4:45 am. They were pouring 10 min later. The excavator is just there for the lights.

It was a big scene that morning. We have been doing our best to keep the construction traffic localized to the immediate area around the building site to limit the damage caused by such massive equipment. To be honest, I am quite pleased with the results so far.


Here is the inspector performing a "Slump test." He filled the cone with concrete then removed the cone. Next he measured how far down the concrete fell in relation to the top of the cone. Our concrete fell 3.5 inches. This was good and we passed the test. Over 4 inches and we would have failed.

These cylinders are another test. They are filled with concrete and broken on 7, 14, 21, and 28 days after pouring to test the strength. The concrete we poured was 3000 psi. Everyone on site was confident that it would test stronger than that.


Here is some freshly poured concrete. We poured 42 yards, at 10 yards per truck we had 5 trucks that morning.

Rebar


After the forms are built, in goes the rebar!

Here we have #4 on the right and #5 on the left.

Cutting Rebar.

Kristi is bending rebar into squares. These tie onto some of the footings. Someday, when you are visiting us in our house, I will show you many more pictures of bending rebar into different shapes for different purposes. If you want.

Here is the day of our inspection. You can see the forms for the footings in the center still need to be finished. The rebar sticking up is tied together to hold it in place, when the concrete is poured, it will be straightened out.


This picture is actually from the day we poured concrete. It shows how the rebar is tied together. Underneath the rebar are dobies. The rebar needs to be three inches off the ground before the concrete can be poured.

Forms

After digging out the foundation, the next step is to build forms.


The ground is extremely hard where we are building, but some areas need to be compacted.


The first real step to building forms is finding the corners and making sure everything is square. The guy working the sledge is the infamous Steve of King Concrete.

As you put the stakes in, you also set string lines to mark the outside of the walls. You will notice two parallel strings here, the string in the center is the outside of a wall right in front of the photographer. The string to the right is for a wall at the far end, the string is just extended. The colors of the string do not matter in this photo.

Here is the beginning of the forms. The stakes are pounded in the ground and the form lumber is nailed on. The height of the top of the lumber is critical and constantly adjusted to be correct.

Here you can see both sides of a form. Many stakes are needed to hold the concrete in.

Saturday, July 11, 2009

Digging

We have been very busy this last week digging out the foundation.

We rented a backhoe for 1 week. Day 1 went well, with both of us learning how to operate we actually got a lot done. The morning of day 2 The U joint broke on us. We called the rental yard and they came out with a truck to pick up the machine. We rented another tractor with a gannon this time.

Here is the second machine that we rented. This actually turned out to be a good thing as we used the gannon, which is the attachment on the back, quite a bit.

Here you can see things starting to take shape.

We took some time to work on the driveway also.

By the last day we really needed the backhoe again to dig some footings. This backhoe came equipped with an extend-a-hoe. Extend-a-hoe's are very useful and should you ever have the option I highly recommend them.

Here we are on the road back to the rental yard. I took it all the way up to 4th gear!